Saturday, June 22, 2013

A New Sewing Machine!

Last weekend, there was a street-long yard sale in my town. My mom and I went, with the intent to buy an old suit cheaply to practice tailoring on. We were able to find two suits, but even better than that was the sewing machine we found! It was sitting right by the sidewalk, with a price tag saying $10. I immediately stopped to lool at it, and the person selling it told me it was in great condition, and worked perfectly. I bought it (for less than ten dollars), and tried it immediately when I got home - and it does work perfectly! All the accessories are included, and I now have a sewing machine to bring to college with me!

Sunday, June 16, 2013

A Look at the Past

Even though I just started this blog a year ago, I have been sewing historical garments for six years, and I have been sewing for nine years. So, I thought I would give a quick overview of some of the other stuff I've made, and if anyone has any questions about anything you can feel free to comment and I'll reply!

Let's start at the beginning... This is me, age 8, in my very first sewn garment, a skirt! The material was really nice, a blue cotton with silvery-white dandelion puffs on it. It was an introduction to simple straight sewing, as well as sewing a drawstring and a casing. This is still hanging up in my closet :)

Me, age 8... yup.
So, I sewed a pair of pants after that, followed by a pleated skirt and a sundress, before deciding that I needed a colonial dress. I hadn't been to Williamsburg for five years, but when I was twelve we returned. I saw that they had a costume rental program, but it was out of our price range and really meant for smaller kids, so my mom suggested that I sew a dress of my own. She made one first for me, to see how hard it would be, and then I sewed one using the same pattern for my best friend.

Me, age 12, and Hopey, age 13
Hopey, TJ, and me two years ago! Our dresses still fit us, although I had just finished my blue dress and so I wanted to wear that. I wore my purple dress in December for the Illumination though!
Then, after a particularly cold December debut of the new dresses, I realized I needed a cape. So, I made one!

Brr! It's too cold for Hope and me to be out in just our dresses! (By the way, that's my Mom in the middle) :)

So I made a cape! This is my friend Nicole (we're practically sisters) playing with me in the Powell House, wearing my purple dress and a Civil War cape of her own.

Nicole and me in the stocks with our capes.

Following that, I made the blue Civil War dress that I've already posted about...

And then I made a corset, 1770's reproduction mitts, and a shift.

Of course, the corset is where my blog started covering my sewing life, and the prom dress, Dolley Madison gown, side panniers, pocket, muffs, and 1770's dress followed. And now here we are! I know that some of that stuff still needs to be posted, but all that is on its way. If you have any questions about anything I've sewn or posted pictures of, please just comment and let me know! :)

Saturday, June 15, 2013

A Civil War Ball Gown! a.k.a. My Blue Dress

For my Sweet 16 a few years ago, I desperately wanted to go to Colonial Williamsburg, and I really wanted to go in a completely historically accurate dress. I couldn't find a pattern that I was happy with that corresponded with the 1770's, but I did stumble upon Simplicity's Museum Curator collection, and I fell in love with this one. Even better, it was on sale for a dollar at our local Jo-Ann Fabric, so Mommy let me get it. This was in September, my birthday was in February, and the trip (which I didn't know about yet) would be in April.

Since most of what I sew is entered as a 4-H project, we decided that the dress could be entered under the category of 'formal wear' (they don't have a history category...), and I was ready to start. Because it called for so much fabric, and expensive fabric at that, we drove out a little farther than usual and discovered the sewing section of Surplus City. It was incredible! They had so much material, hundreds of trims, and everything else you can imagine. The employees were also really nice, and once we explained what we were looking for, we all spent the afternoon finding trims and fabrics, and just generally having fun. Everything cost so much less than it would have at Jo-Ann's, and it was also much less expensive!

When I started sewing, I knew that this dress was going to be the hardest thing I had ever sewn. I was fifteen, and had only started sewing historical things a few years ago, mostly doing costumes that had zippers and weren't that difficult. I had to learn how to make my own bias tape out of velvet, which was challenging, but really cool once it worked. I got to hand sew 72 rosettes, most of which I worked on during school when I didn't need to be taking notes. :)  I learned about different ways to attach trim, and discovered what a nightmare trim can be sometimes. I worked with boning for the first time (although certainly not the last!), and I learned that when gathering a big skirt, it's always a good idea to have multiple lines of basting, in case one breaks.

Finally, the dress was done. It laced up the back and fit perfectly; it never itched and it looked good. I was extremely excited to wear it to Williamsburg, and even more excited because my dance teacher had loaned me a ton petticoats to wear under it, as I didn't have a hoop skirt (we had fooled around with different ideas of how to make one cheaply, but none of those came to fruition). My best friend came with us to Williamsburg, and wore the dress that I had made her a few years before for wearing in Williamsburg (my first Williamsburg dress was the same pattern as her's, although different material). It was one of the best trips ever! We ate at the King's Arms Tavern, and our server told us that in colonial times they would have extra-long tablecloths that tied around their necks like bibs, and at the end of the meal the tablecloth would just be gathered into the center and taken off - and then he went and got us a special tablecloth, and did just that for us! That was the first time I can remember thinking - I want to be able to do this for someone someday; take an already special experience and just make it as amazing as possible. I felt like a true colonial lady, and I can't wait until I am able to help someone have the same experience. We also went on a carriage ride, and visited all of my favorite places. Everyone treated me like I belonged in the time period, and a lot of tourists thought that I worked there!

Even though the dress was from a time period 90 years later than CW, I still felt radiant the entire time that I was there, and I know I'll always love that dress. I have a lot of pictures of myself in the gown, but this is one of my favorites, taken in the DeWitt Wallace Museum in Williamsburg during my birthday trip.


The back of the dress, it laces up

Just TJ and Me

Patrick Henry!

My favorite founding father, Thomas Jefferson

A carriage ride through Williamsburg :)

Meeting the Marquis de Lafayette for the first time - he said we were clearly intelligent, as we both knew that blue was a superior color!

Ta-da!

Thursday, June 13, 2013

Side Pannier Hoops - More Undergarments!

So, recently I have been on an undergarments kick. I know that sounds really strange, but without the proper foundations, historical clothing just doesn't look quite right. Actually, the whole issue of having proper undergarments, as well as some really cool history on underwear, is explained in a podcast from How Stuff Works - Stuff You Missed in History Class, called "Bloomers and Beyond." You should check it out! Anyway, I decided that I needed side pannier hoops, and I needed them badly. I started doing some research on how to make them, when I stumbled across The Dreamstress. Not only does this awesome lady sew a ton of historical garments, she blogs about them, and even has some where she goes step-by-step so that anyone can do it! Needless to say, I was super excited to discover her website. I became even more excited when I discovered that she had done a "Pannier-Along," so that others could make their own panniers! I'm not going to go step-by-step here, because the Dreamstress has already done such a good job of it, so I'll just post some of my pictures, and wish you all luck!

This is the image for the button, but the link is up above, because I struggle some with technology.
Channels for the boning in place!

I am so proud of myself for how nice these pleats look, because I got them right on my first try!


My reeds! These cost about $5 for each bundle, and I needed two bundles.
All cut to length, waiting to be shaped.

I put two buckets, one inside of the other, so properly open up the reeds. The bucket with the bag has water in it.

Keeping the reeds stretched open while soaking.

The reeds soaking, the bag closed with a rubber band.

Ready to take out!

Drying in their new shape...

...and ready to put in the channels!

All pleated and ready to go, just needs a waistband.

Done!


My 48-Hour Dress - The Dolley Madison Dress - Just in Time for Easter!

Almost a year ago (has it really been that long?) I posted about my visit to Montpelier, and how I absolutely fell in love with the dress that the Dolley Madison interpreter was wearing, as well as a lot of the other dresses in the museum. I had never looked into regency clothing much before that, but I am hooked now. The late 1700's are still my favorite time period, but I am slowly falling in love with the 1800's as well. Anyway, I had a pattern (Simplicity 4055) and an inspiration, and a break from school coming up, so it seemed like the perfect time to sew! Well, it's always the perfect time to sew for me, but that's besides the point. :)


The Dolley Madison interpreter from Montpelier, wearing the dress that inspired me.


The dress Dolley wore (well, a reproduction of it) in the museum at Montpelier.


So, on Maundy Thursday, Mom and I went to three new fabric stores and spent all day looking at wonderful fabrics, trims, notions, and pretty much being in a costumer's heaven. It was nice to have a mother-daughter day like that, and we got everything I needed for the dress! It was also nice, because I had just found out two days before that I got into my first choice school (William & Mary - Go Tribe!!!), and when we came home my acceptance letter from my second choice school (Washington & Lee!) was waiting for me in my inbox - it was a great day all around!

Anyway, I wanted another white eyelet dress, and we found the perfect material at a really good price at an Amish store called Verna's. I highly recommend checking it out if you live in central PA. It was a bit of a drive for us, but totally worth it. I also got a few different ribbons and trims there, as well as the buttons for my dress. We then went to another store (Hoover Bernina) where we didn't buy anything, but did discover how far sewing machines have come in recent years. I haven't sewn on a machine younger than 40 years old, and so seeing that new machines have color touch screens and USB drives for embroidery was eye-opening for both Mommy and myself. The staff there was really friendly, and I would recommend checking it out (again, if you live in PA), especially if you are into quilting - and they even offer workshops and classes for making different projects! We followed Hoover Bernina with a trip to Ben Franklin, where I bought more ribbons and trim (I love that sort of thing, and I can wear different ribbons with this dress), and ended at our local Jo Ann Fabric, where I bought the plain white material (it was cheapest there).


My fabric, lining, the new ribbons I bought, and the pattern that I used.


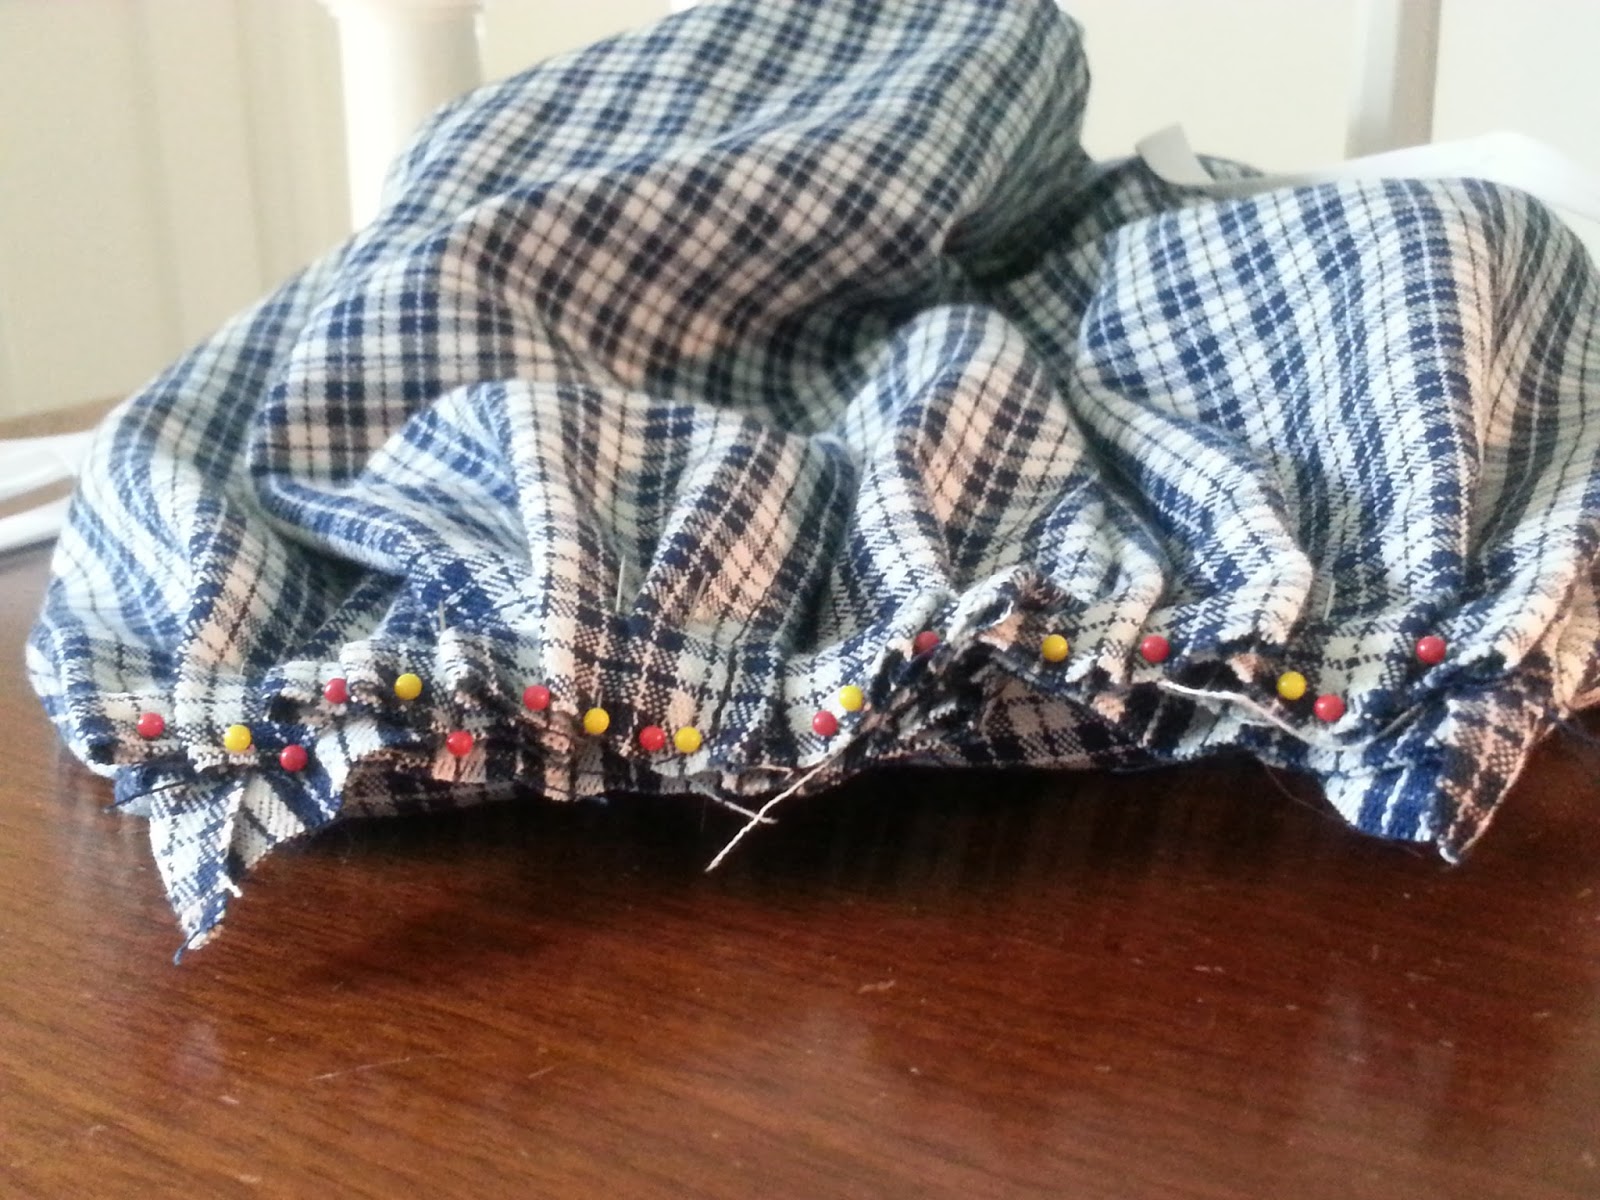
When we went to wash the fabric, we discovered that the embroidery on the eyelet didn't go all the way to the edges! So, after a quick trip back to Jo Ann's we learned that it's always like that, and the pattern accounts for stuff like that - crisis averted, and time to get sewing!

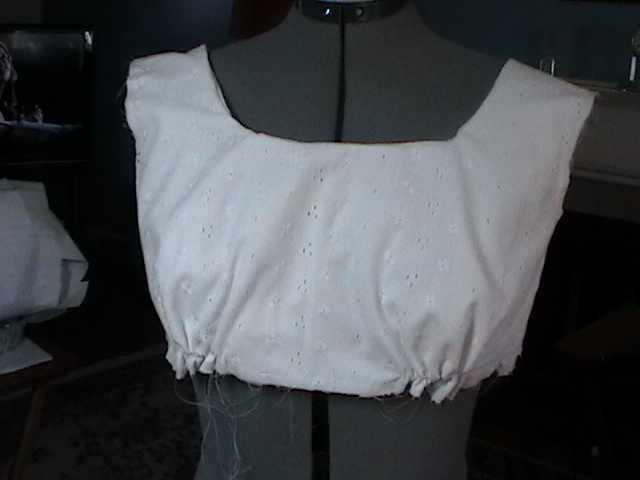
From doing some research on the internet, I had discovered that this dress has a very short bodice, even for an empire waist, and that I would need to extend it by a few inches so that it would sit below my bust and not rise up periodically. I would recommend doing this too, because the way the pattern lays out the top of the dress would not work well for anyone.

The bodice cut out, longer than usual...

...but fitting perfectly!

A back view of the bodice, no buttons yet!

Other than extending the bodice, this dress didn't really have any necessary changes, and was pretty easy to sew. I would suggest doing the lining first, so that you can make sure everything will fit you as this pattern runs small, but that's what I do for everything, as it's the easiest thing to do, and the lining is easier (and usually cheaper) to fix if you need to change anything. Even though there was nothing else that needed to be changed on this pattern, I did opt to make the skirt overlay the same length as the lining, because my overlay was not sheer, and was the same color as my lining. Also, that's the way the Dolley Madison dress was!

So, after putting the fabric in the wash, I started ironing it all out at noon on Good Friday. I sewed all that night, went to bed around midnight or one, woke up the next morning to sew in between setting up for an Easter egg hunt at church and dying eggs with my family, I sewed until midnight, woke up at 4:30 the next morning, sewed on the three buttons, and went to Sunrise Service for Easter, wearing my new dress!

The buttons! They're pearl buttons in the shape of hearts with carving on them - so pretty!
This dress was a lot of fun for me to make, mostly because I felt really professional while making it. I proved to myself that I could sew all day and still be smiling at midnight, and that I had the ability to make clothing that quickly if I needed to. Since Easter, I have worn the dress for a class presentation on Pride and Prejudice in English class and for Sewing Showcase with my 4-H group (a little fashion show for a local nursing home). I might wear it to Williamsburg some day, especially if I go to see a James Madison interpreter!


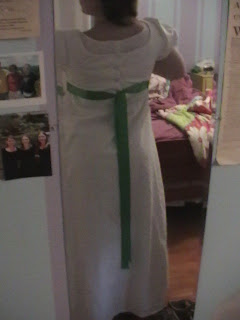
The back, you can just see the top of my shift as well... Stay tuned, as I'll be making another one some day!


Making a Prom Dress!

As a senior, I will be attending prom this year, and ever since I was little I have had a very specific idea of what type of dress I want. Unfortunately, it's been nearly impossible to find the right one, and they're all so expensive - so I decided to make my own! I'll be using Simplicity pattern 3878, although I will be making a few small changes as I go.


First, we bought the material, and the notions that I would need. I decided to forgo the boning in this dress unless it needed it (it didn't), because boning can be uncomfortable after a while, and isn't always nice to work with. Furthermore, I have another dress of similar material that has boning in it, and sometimes the boning places to much stress on the fabric and begins to rip/wrinkle it.


The first thing to do was sew my bodice. I got a dressform for Christmas (thanks Mom and Dad!). and I absolutely love it! It's been really helpful to have a copy of myself to hold things up to while sewing, and it makes it much easier to show you pictures during the process! Anyway, when making the bodice, there's a lot of gathering, which is fine, but you need to make sure that everything is exactly how you want it to be. Once you sew the pieces together, it will look like that forever (unless you want to rip out some seams...), so make sure you're happy with your gathers before hand! Also, I would recommend having your gathering stitches closer to the edges of your fabric than normal. They are easy to see on this dress if they peep out anywhere, and with the tulle it's really frustrating to try picking stitches out.


Onto the skirt! The first thing I sewed was the outer silky skirt, which was all easy straight sewing. Next came the lining, which was just like the outer skirt. After the lining came the crinoline pouffy-ness at the bottom... don't break your thread when you gather this! This was the worst part of the entire dress for me, because I had to go back and re-sew gathers so many times. I recommend doing this part in sections, where your gathering threads divide the skirt into thirds, so that if one breaks you won't lose all of your hard work, and it is much more manageable to work with.


Finally, you sew the top layer of the skirt. Now, the instructions will tell you to sew it just like the other layers, and then gather it at the top. I tried that, and then ended up going back and doing it my own way, which worked better for me. I gathered each individual section first, and used binder clips to make sure they would line up with the other layers of the skirt. Then I sewed the sides together and attached everything. I found it easier to meter my gathering this way, and it just made everything more manageable.


Finally, you put the zipper in and add the lining! I've been doing so much historical costuming recently that I had to struggle to remember how to put in a zipper! I got it after a minute though, and I am pretty pleased with how well it blends in. Finally, you sew the lining together in the same way you sewed the base of the bodice, put it all together, and you're done! I opted not to include the ruffle at the top (I just knew that would end with itchy armpits, and I didn't want prom to be any less fun because of something like that), and I also chose to not add the ribbon or the rosettes. And voila!


Please ignore the fact that I have a leotard on under the dress here, I was at Sewing Showcase (a mini fashion show for a local nursing home) and then going straight to dance class.