Showing posts with label Accessories. Show all posts

Tuesday, May 29, 2018

March: Comfort at Home

This post is late because I haven't been able to get any good photos of my project yet... as soon as I get better ones I will update this!

For March, the challenge was "Comfort at Home", and as someone who almost always wears historical clothing in front of other people out in public, I was initially stumped. However, it only took a little brainstorming for me to realize that I wanted a banyan! I've always been a fan of wearing sweatshirts, bathrobes, etc. around the house, and a banyan is just the 18th century version of those things, so it would be a prefect project for me.


After a big sale this summer, I had a lot of pink flowered fabric in my stash, but after sewing a jacket with an almost identical fabric (I'll post that as soon as I have pictures taken), I was kind of sick of the pattern, and didn't want to wear it on a gown or anything like that. So, it was perfect to use for the banyan, since it would be easy enough to re-cut as a gown if I ever changed my mind about the banyan or the fabric.

Simple shapes make cutting many 18th century garments easy
It was easy enough to make; I worked off of the pattern in Fitting and Proper, and altered it for my own height. Banyans are essentially rectangles with rectangles for the sleeves, and they flare out slightly at the bottom. There are pleats at the back of the neckline, which I might tack down the back at some point in the future to give it a more fitted look, depending on if I ever use it for anything outside of the home.

I've worn it around my home, and I also wore it during a sewing circle evening with some friends - it was definitely a much needed accessory for me!

A reaction to dramatic information being revealed in such a historical manner!

Thursday, March 1, 2018

February: Under

For the Historical Sew Monthly, the February challenge was Under: Make something that goes under the other layers.

I originally planned to sew a new set of stays using the brand new American Duchess pattern, but then I decided to start a diet, and so I'm going to hold off on any fitted undergarments until my measurements are a little more consistent. However, there are plenty of non-fitted undergarments to sew, and I managed to have quite a lot of fun this month!

My big project was a new false rump. Some of you may remember that I sewed one a little over two years ago, but that there were clearly some problems with it. It was 100% polyester first of all, between the synthetic fabric and the polyfil stuffing, but I was also never fully satisfied with how it looked. I referenced a number of 18th century bums, looked at patterns that others had shared, and still didn't like how it looked on me. I think part of the problem was definitely in the materials, since polyester just acts a little bit differently than natural fibers, but I think the biggest problem was my expectations warring with reality. The rump I sewed in early 2016 was crescent shaped, and although it was based off of a number of extant examples, the overall look I wanted from the entire outfit probably would have been better achieved with a split, more pillowed, rump.

Every good project starts with some research and planning!

So, after receiving the American Duchess Guide to 18th Century Dressmaking for Christmas (thanks Mom and Dad!!!), I decided that I would make a new false rump, this time following the pattern in the book. I've had some fabric set aside for an Italian gown for a while now, so I figured that I might as well drape it over a false rump! Because Lauren and Abby did such a good job, the instructions and pattern in the book are super easy to follow. I cut out the two pillows and sewed up their sides, and then cut and hemmed the panel of fabric.

I often just use pins instead of marking chalk/pencil/etc. I find that they're easier to alter, and I would have to pin anyway to prevent the fabric from slipping when I cut, so I might as well just save myself some time

Each side cut out and ready to go

The pillows sewn together

By this point in my life, I've spent a lot of time looking at extant false rumps, and there are some that have an extra panel of fabric down the back, like half of a petticoat, and there are some that are only the pillow itself. I wasn't able to find an answer to why that extra fabric was sometimes there and sometimes not through all of my research, so I paid a visit to the Milliner's Shop to pick their brains, and they had the same answer I did: We're not sure! However, they had some of the same hypotheses that I did, and so we talked them over a little. Maybe the extra fabric helps to keep the rump in place (my polyester one certainly slid around, but I had blamed that mostly on the fabric). Maybe it kept the false rump from going up too high when you sit down. Or, maybe it keeps potentially sharp feathers from poking you! I would love to be able to fully research this, probably starting with analyzing the stuffing of extant rumps and making a chart to see if there's any correlation between which ones have extra fabric and which ones don't. However, I have a number of other projects that I have to get to before that, and some of those are long-reaching research projects for work, so it might be awhile...

The skirt on its own...

...and with the pillows sewn on!

Anyway, once I had the rump sewn together, it was time to add the stuffing! I really wanted to use cork, because I thought that would be super cool, but I don't drink nearly enough wine for that to be feasible. I don't have easy access to feathers, but all I had to do was wander across the street and ask for some wool! The Weavers were incredible kind, and gave me two pounds of washed wool, which I then got to card! However, I didn't have wool cards, and as cool as it would be to own some, I didn't want to spend over $100 on them at this point in my life. Luckily, wire animal brushes are a really good substitute, and they only cost me $4 at Wal-Mart. :)

One of the many Leicester Longwool sheep at Colonial Williamsburg, and a good source of wool!

Dog brushes with some un-cared wool


It's a good day at work when you get to sew a false rump!
(And don't worry, I wasn't using the modern brushes in front of guests. We were having a slow morning, so I was able to do some of the carding then)

Carded wool for the stuffing!


I enjoyed carding the wool, stuffed the pillows with it, and immediately tried it on. So, I now pose the eternal question to all of you:

Does this make my butt look big?


(I hope so!)


The Challenge: Under
Material: Cotton fabric, wool stuffing
Pattern: from the American Duchess Guide to 18th Century Dressmaking!
Year: 1770's-1790's
Notions: Linen thread, twill tape
How historically accurate is it? 100%, or as close as anything made in 2018 can be to 100% accurate. It's entirely handsewn with all natural fibers. I carded the wool myself, and I know the sheep it came from!
Hours to complete: About 4 hours to sew everything, and probably around another 4 hours to card all of the wool.
First worn: Not yet, just to try on, but hopefully with a new Italian gown in the near future!
Total cost: ~$5, I already had most of the materials or was able to get them for free/cheap.


Even though the false rump was the main attraction for this month's challenge, I also sewed another new pair of garters. During the first half of February, I went through training to become a nationally certified interpreter (yay!), and part of the certification required a small interpretive program that we each presented to be graded on. For my interpretation, I decided to talk about self-expression in 18th century fashion, since that's pretty much my favorite topic. I mentioned a lot of different ways one could express personal views in the late 18th century, but it should come as no shock that garters received the most attention. I brought in some earlier pairs of garters that I had made, but decided that I also wanted to make a pair that would help connect the subject matter to a modern audience. In the 21st century many people wear t-shirts or hats that come right out and say what they support, be it a political idea, religious affiliation, or love for a sports team. Since I see so many people wearing garments supporting various teams every day, and because I really like hockey, I decided to embroider a pair of garters that mixed 18th century fashion with 21st century expression. I present...

Game Day Garters!


I've had this idea for a while now, so it was fun to finally execute it. The St. Louis Blues are one of my favorite hockey teams, and since my garters are always covered by my petticoats, this will be a great way to cheer them on, even when I have to work during some of their games. If this wasn't such a niche market I would start a company making Game Day Garters, but if you're interested in a customized pair, just let me know!

I made a pair for the Toronto Maple Leafs while watching their Next Century Game in January, although I will probably make another pair in the future that I don't freehand entirely while I'm distracted so that they can be a bit neater and better planned out. On both sets of garters I've included the phrase that the club has been using recently; the Blues have been using #AllTogetherNow as one of their tags on social media this season, and the Leafs had the featured phrase over a doorway, and somewhere there is a spectacular photo of it, although I have been having trouble relocating the image...

Why it's important to draft before embroidering... this could have been wayyy more centered, and a lot better proportioned

I still really love the words though, and I am looking forward to making my next set of Leafs Garters!


 Bonus Photos!
My parents came to visit me for my birthday/my mom's birthday, and they stayed in an 18th century house! This was a fantastic photo opportunity, so we got a few neat shots of me tying my garters, reminiscent of some 18th century paintings and images.


Stay tuned for more historical sewing projects! Coming up, there's the challenge for March, which focuses on comfort around the home, and I'm pretty excited about what I'll be making. I also received a commission with some super awesome fabric, and so I'll be posting that with permission at some point as well. If anyone has any suggestions for what I should sew in the upcoming months, just let me know, because there are still a few months that I have absolutely no clue what I'll be doing! And, if you want to follow along with the Historical Sew Monthly, or join in and do some of the challenges yourself, you can find all of the information on that here.


Saturday, August 19, 2017

Day 19: Ornament

This is the first post for this month that I really struggled with. I don't do a lot of ornamentation because so many of the things I make and wear aren't displaying that sort of wealth or that type of life style. However, I realized that there is one way I like to ornament my ensembles, and that's with a hat that makes a statement. Usually, that means a market bonnet!

I know that I've posted about market bonnets before, but I wanted to highlight the many different ways that they can be ornamented.


Plain black silk goes with pretty much every wardrobe - even in the 21st century!

While black was certainly the most common color, every now and then it's nice to be a little bit flashier - I trimmed this red silk market bonnet with scalloped while silk and a bow with pinked edges!


Here's another market bonnet that I made, this time a standard black bonnet with a pretty teal bow and scalloped trim!

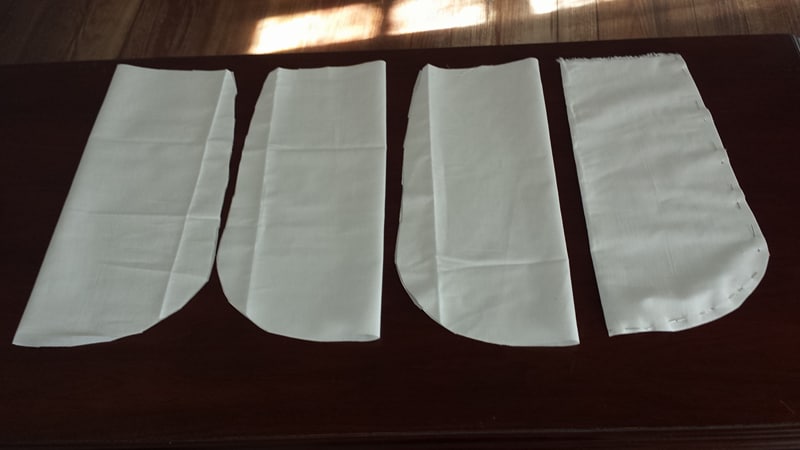
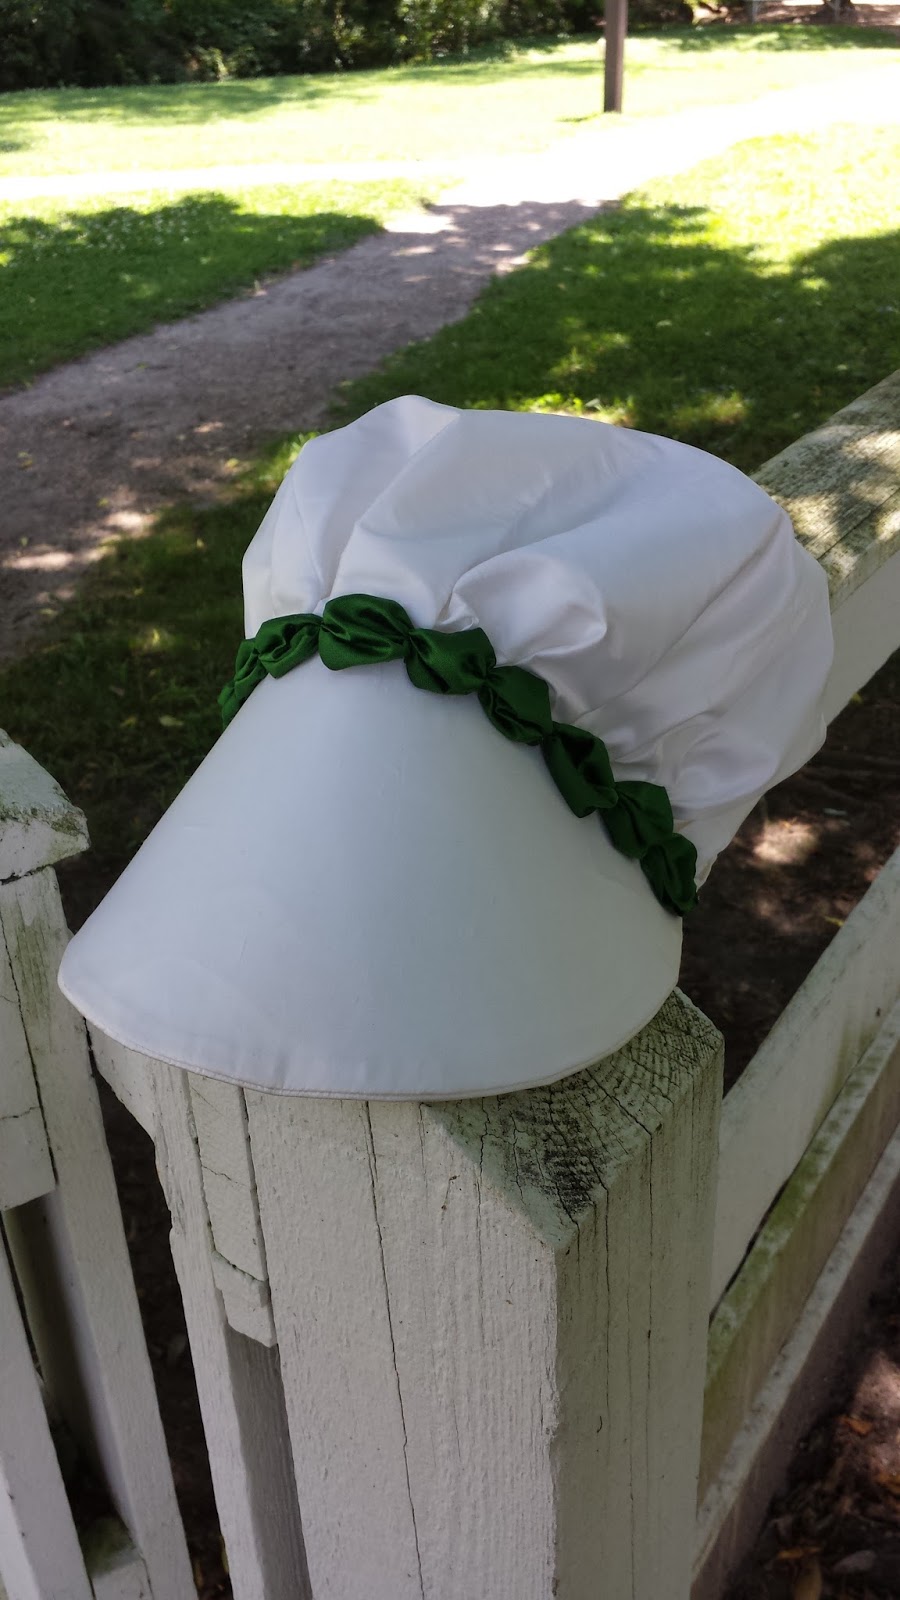
And one of my more recent projects, a white market bonnet that I added scalloped green silk to this summer for a friend!

Market bonnets are a great statement piece for any wardrobe, and there are endless ways to ornament them! They're one of my favorite things to sew, and if you want one for yourself, send me an email and let me know (stacylynnsews@gmail.com).

Wednesday, August 16, 2017

Day 16: Small Project

            If you’ve clicked back through my blog, or been following me for a little while, you have probably seen my post on garters. In essence, garters are a great part of 18th century material culture, because they could show off a lot of personality, as well as carrying important messages. Since I do most of my 18th century sewing at work, I like to work on projects that show a side of historical people most visitors wouldn’t have considered otherwise, and garters are a great way to do that.


            This month, I’ve taken a saying from an extant pair of garters, halte la, on ne passe pas (stop here, do not go further), and mixed it with a design found on other sets of garters from the period.


            It’s a nice way to work on my embroidery skills while also sharing a small peek into the personalities of the past. In 200 years, historians might find a Grumpy Cat t-shirt and wonder if its owner was particularly anti-social, or simply had a sense of humor. This is the same question we get to ask today when we look at garters like these, and it’s exciting for me to be able to connect the past to the present in such a vivid way.


I don't have a lot of information about these individual garters. I know they were used in a museum exhibition showing underclothes and accessories from 1812, but I also know that this style was seen as early as the 1770's. Furthermore, one of my colleagues who speaks French much better than I do pointed out that "la" should have an accent to indicate its use as a place and not an article. I don't know if this was optional in 18th century French, or if these were perhaps made/decorated by a young lady who was just learning French. After all, you can buy lots of shirts that say "amour" and "bonjour" on them today, why wouldn't French, the language of diplomacy, be just as popular for ornamentation in the 18th century?

Sunday, August 13, 2017

Day 9: BIG Project

            So, every now and then you see something, whether it’s in a store, on the screen, or in a book, and your first thought is, “Well, that’s just ridiculous”, followed up immediately by, “I must have it.” That was the story of me with the calash. I saw it in the Milliner’s Shop in CW when I was young, and after the half second required to make a face at how ridiculous it was, I decided I needed to sew one someday.

Some period depictions of different calashes


            Last summer, I sincerely thought about starting one, but I didn’t have any fabric suitable for it. I wanted to make one that was green silk, with a pink or red lining, since I had plenty of documentation for 18th century calash bonnets fitting that description. (There are so many shapes, sizes, and colors of calash bonnets though, check out the MET's collection!) I found a bargain on green silk and ordered it last August, and then in March of this year I found some pink linen that I loved at the Fort Frederick Market Fair. One of my friends had some reed she was giving away, and with that, my calash was born.
            I started by analyzing the calash from Fitting and Proper, and replicating the measurements at their full scale. From there it was simple straight sewing to make the rectangle with all of its boning channels and gathers, and then add some ruffled edges and insert the boning.

My half-gathered silk in one of my favorite break rooms/sewing spots at work
            The biggest challenge was probably trying to keep my stitches invisible – no matter what color thread I used, it would show through on one of my layers. I experimented with different stitches, keeping them discreet, and eventually found something I was happy with. If I was to do this project again, I might consider using tapes to make the channels on the linen lining, and then pick-stitching the green silk over top. However, this method was certain cheaper and faster! I am also contemplating making another with just the green silk, and folding the silk around the reed to sew the channels that way. It would be lighter, and would also solve the problem of visible stitches.

Sewing gathers after boning channels
            One of the things that really excited me about this project was how much I would get to learn. In addition to the basic research one does when they undertake a historical sewing project, I also realized that I would be learning more about how an 18th century lady carried herself. As I sewed, I interpreted the project, and found guests asking the same questions I had been asking myself: Would it really balance on my shoulders with just the small ruffle and tie? Would it actually stay up like I wanted it to? What if my arm got tired from holding the ribbon? (I especially love questions like that last one, asked by a very young girl. The smallest visitors usually have the most insightful questions regarding the practicalities of everyday life that would otherwise be overlooked.)

At this point, most visitors who saw me working remarked that it looked like an accordion or a caterpillar! You can also see some of the reed I used in the lower right corner.

All of the cane cut to length and inserted into the channels - it was quite the monstrosity at this point! (And I can't wait to make an even bigger one!)
            However, once I finished the calash, I had answers! I still haven’t added the ribbon, but if your arm does get tired, it’s okay – the calash stays up on its own! I don’t know if I could run in it, or if it would stay put in gale force winds, but I am certainly able to walk around and go about my business at work with it on.


            So, for a project I spent a month affectionately referring to as my ‘starburst watermelon hat’, I’m pretty pleased with my fancy outcome!


*This post should have been published on Wednesday, August 9th. However, I was on vacation and was not able to photograph everything before leaving

Thursday, August 10, 2017

Day 10: Visual Source

            As an interpreter in Colonial Williamsburg, I’m in costume every single day. While I sometimes wear my own 18th century clothing after sending it through the review board, most of the time I wear clothing from my allotment, made by our Costume Design Center. About a month ago, I paired my brown jacket with my blue petticoat, and one of my friends told me that I looked like a painting she knew!

The Chocolate Girl, by Jean-Étienne Liotard, 1745

            Obviously, I looked it up, and the similarities were striking.

            It only took me a moment to decide to replicate the rest of the outfit (and maybe the petticoat and jacket eventually, but not quite yet). The apron would be easy to make, and the cap, while slightly different than other caps that I’d made before, wouldn’t present too much of a challenge.

            For the apron, I was fortunate that I had a length of linen in my sewing stash, so I whipped up a pinner front apron using the portrait and a few other extant garments as my references. I mostly used the apron from Costume Close-Up, although I altered a few of the measurements to make it fit both my body proportions and the look of the portrait better.

            The cap was a bit different, since I had to do some more guess work and a lot more research, but it did come together. You’ve probably already seen my post from Day 2, but if you haven’t you can go back and check it out.


            The final step was to stage a photo shoot in the only place that made sense – the Charlton Coffeehouse! They serve sipping chocolate made using an 18th century recipe, and so I posed with one of their trays and some china, and the help of a few of my friends.


Tuesday, August 8, 2017

Day 8: Vocabulary

In the 18th century, a housewife or hussif was something commonly found in the home, and kind of the 1700's equivalent of an empty cookie tin that holds sewing supplies. They were often made of scraps, and could be customized to hold whatever the seamstress needed, and then would roll up for easy storage and transport.


I found myself in the position of having enough scrap fabric to save, but not enough for a bigger project, so I decided it was finally time to sew a housewife! There weren't a lot of rules that I followed, and I kind of made it up as I went along, but I think that's faithful to a project like this in the 18th century as well.

To begin with, I cut out two rectangles that came to a point a one end, and I also cut out three more rectangles to serve as pockets. I can always add more pockets if I need to, but for now I wanted to have a lot of space to stick pins into.

My beeswax pocket and the slightly larger pocket (currently being used for my measuring tape)

The big pocket and pin storage

I sewed the pockets to the body, and then sewed the two largest body rectangles together, right sides facing out. I wanted my housewife to have lots of color and contrasting patterns, so I chose to bind it in a contrasting print. Making the binding was a simple matter of cutting strips about 2" wide, and then folding it over as I sewed.


In sewing the pockets to the body, I used a variety of different stitches. While I'm not familiar with any 18th century housewifes that this can be seen on, I wanted to use mine as a kind of sampler, so that visitors could understand what different types of stitches look like without necessitating me altering whatever garment I am currently sewing.
A whip stitch

A running stitch, or a basting stitch
A backstitch

My last step (and what I should have done before adding the binding, but oh well!), was to add ties to help keep the roll closed. I knew that silk ribbon was an option, but I also knew that I would be using this quite a lot, and after seeing how the silk ties on a friend's housewife were holding up I decided that it would be better for me to turn the selvage edge of a scrap piece into a much sturdier tie. Instead of sewing the tubes inside and then struggling to turn something to tiny, I just folded the raw edges in and sewed along the very edge, and since the final width was roughly 1/4" that worked very well.

It looks a bit cleaner in real life; I was having trouble getting a good photo of the ties where they attach to the roll

The finished product!

Overall, I am very happy with this project. I started using it immediately, and I don't know how I could have ever kept my sewing supplies floating around in my basket! I am looking for a way to make the pockets closeable, as my thread sometimes escapes when I first unroll it, but that might just be user error. My favorite thing about my housewife is the stitching. Since I do most of my sewing in front of the public, I wanted to have an easier way to answer questions about stitches, so I turned the project into a sampler! Now, I can point out what the basic stitches look like without having to demonstrate in the middle of a project that doesn't require that stitch.

Finally, my basket is staying organized, and that is simply incredible!